how to wear yellow and green makeup
so many of us shy away from colours because we’re not sure how to wear them. i wanted to do a follow-up post on the one i did about sultry yellow and green makeup. the key to making colours wearable is colour placement. i’ll show with you some tips on how to do this.
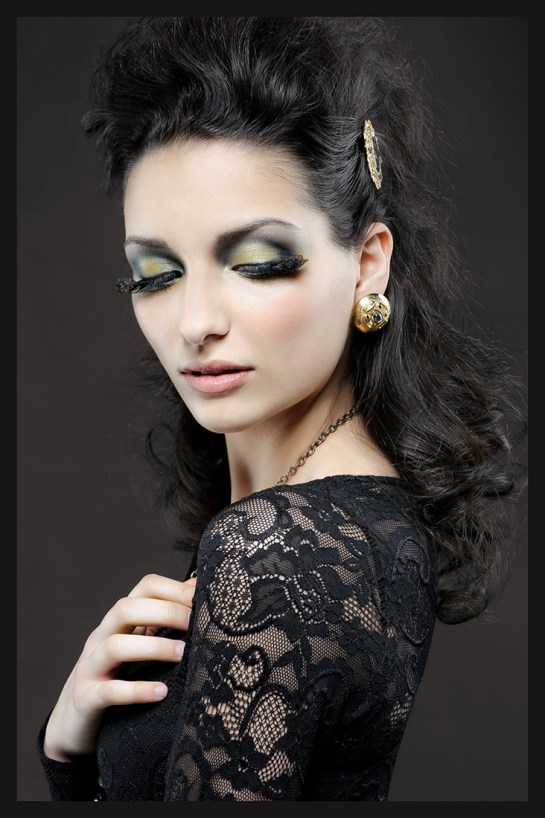
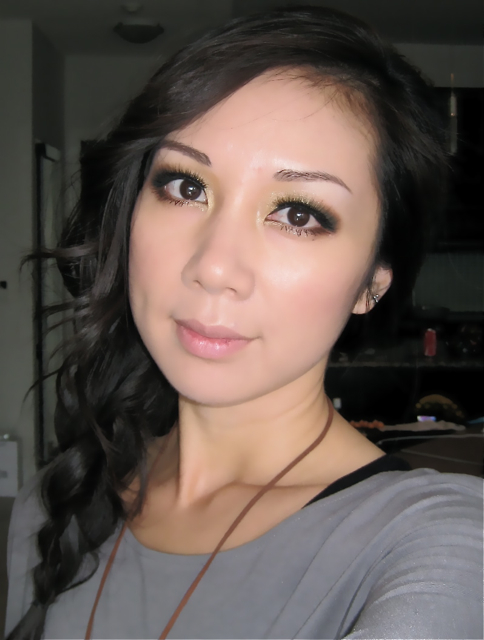
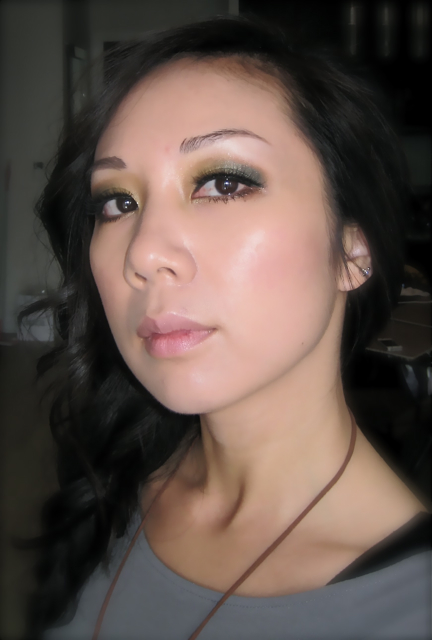
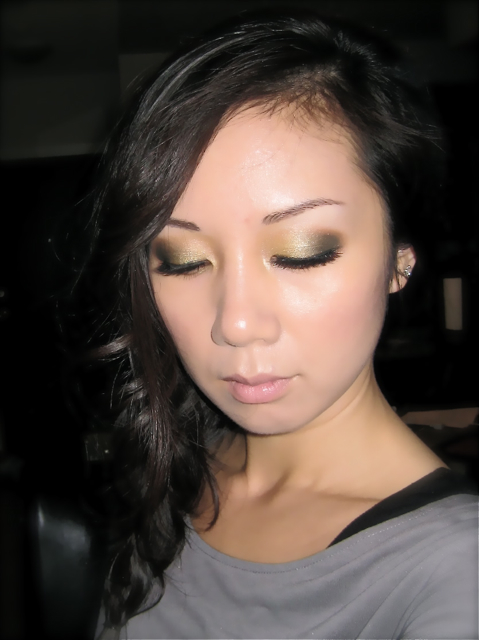
i’ll be taking the same eyeshadow colours from the below look and turning it into a wearable version on myself (please excuse the bright lighting for the photos of myself – i had to take the photos by myself on a small camera with a large flash!):
tips on how to re-create this look. you can basically do this with any colour; you just need a lighter base colour, a darker colour and a matte brown. don’t shy away from colours! :
- colour placement:
- take me soft yellow 336 and apply it using brush 10 all over lid starting from the centre (close to the lash line) and blending away to create a nice gradation.
- use brush 10 and take p dark green 595 and place the colour on the outer corner of eye (the brush is the perfect round shape to place the colour – do this by lightly pressing the eyeshadow on to avoid eyeshadow falling off onto your face) and lightly sweep it inward towards the centre of eye.
- take clean brush 11 and soften the edges of the dark green.
- use brush 5R to apply me soft yellow green 432 to the inner corner of eye and lower inner 1/3 of lash line.
- warm up and tone down the colour with matte brown. this is my big trick on making literally any bright colour wearable. i take m dark brown 895 (i can’t live without this colour; i use it with almost every makeup look), using brush 11 and i soften the edges of the darker shade of eyeshadow. so in this case, the dark green. this automatically tones down the colours and makes it wearable.
- finish off with a pair of fluffy falsies. if you’d like the colour to be less “loud”, wear a pair of fluffy full lashes like shu uemura smoky layers (which is what i’m wearing in the photos), so that when your eyes are opened, the colour just peaks out from behind them. if you want the colours to really show, opt for a pair of more natural lashes like the shu uemura soft cross.
- get the right brushes. i know brushes can be expensive, but there’s a reason why shu uemura brushes have a higher price point. they are designed for precise colour placement and limit the fall off of eyeshadow onto your face. the kollinsky hair brushes are porous, so they pick up a lot of the eyeshadow pigment of place it directly on the eye without the pigment flying out everywhere like fluffy brushes do. to blend colour, use the flat part of the brush to create gradations, rather than fluffy brushes that tend to make the eyeshadow fall everywhere. the essential shu uemura brushes are:
- brush 10 – for colour placement,
- brush 11 to soften edges and blend colours together,
- brush 5R for inner corner (so good for glitter shadows because it places the glitter where is should go without fall off)
click HERE to browse the many fun shu uemura colours. you can seriously re-create this look with any of the colours. just choose one base colour, one darker contour colour and the must-have m dark brown 895 to make it wearable. have fun with it!
for my skin, i’m using the new shu uemura whitefficient uv underbase mousse. it’s a new brightening formula, so it has a purple/pink tint to colour correct and a formula containing vitamin C, algae-white and prune extract that brightens dark spots and inhibits melanin production. the whitefficient line is my current skin care obsession! it’ll be available soon!


Beautiful! Love the subtle look with the pop of colors! I do have to say…those are hard colors to pull off…but this looks wearable!
LikeLike
you have beautiful skin, i know makeup et all, but the canvas is brilliant 🙂
LikeLike
aw thanks! yes makeup does help a lot 🙂 and skincare is so important
LikeLike