collage

brides often ask me whether or not they should get lash extensions for their wedding day. in my opinion, falsies are a much better option for the wedding day and i would save the lash extensions for the honeymoon.

here’s why…

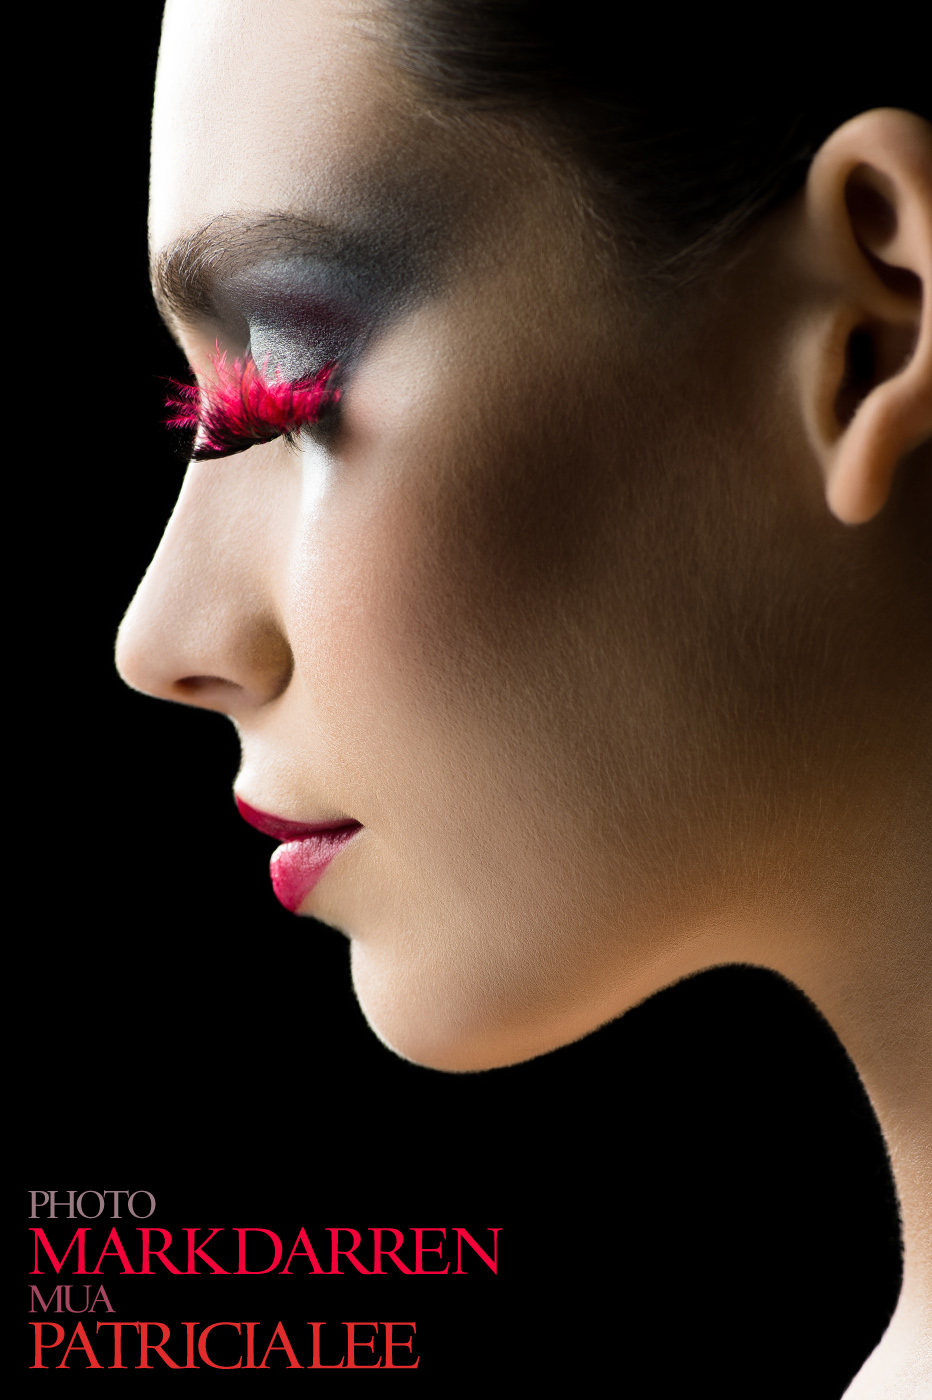
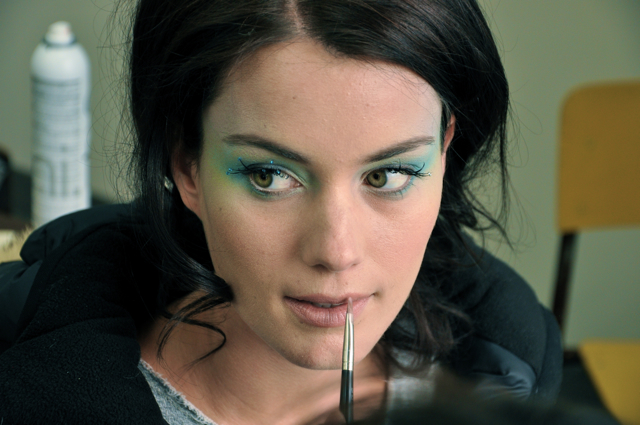
for the camera: lash extensions are great for a natural, day-to-day, makeup-free use, but for weddings, you need full and more dramatic lashes in order for your eyes to show up nicely in your wedding photos. it’s important to remember that for your wedding day, you need a good balance between looking naturally beautifully in person, as well as stunning on camera.

i have had brides who have gone to get the full set of mink lash extensions before their wedding day and later realize that they do not show up very well in their wedding photos. i do think that the extensions look great in person, but are lacking in photos.

for makeup: when brides have lash extensions, it puts limitations on what i can do for their makeup. for eyes to really pop, lashes need to be tight lined; this means that eye liner needs to be applied in between the lashes to really outline the eyes. it is also much more difficult to apply liner to the lash line without ruining the lash extensions. you should keep in mind that in order to remove waterproof liner, you must use an oil based makeup remover which would also loosen the glue used to adhere the lash extensions to your real lashes.

save them for the honeymoon!…

i myself had lash extensions done after my wedding just before heading off on my honeymoon to bora bora and hawaii. it was great because i didn’t need to pack any makeup with me since i had planned on being out in the sun and on the beach every day! they lasted just long enough (our honeymoon was 2.5 weeks). they are supposed to last 3-4 weeks, but it was hot weather and i was in the water so random lashes were falling off here and there.

lash extensions by stephanie trieu at trulyposh…

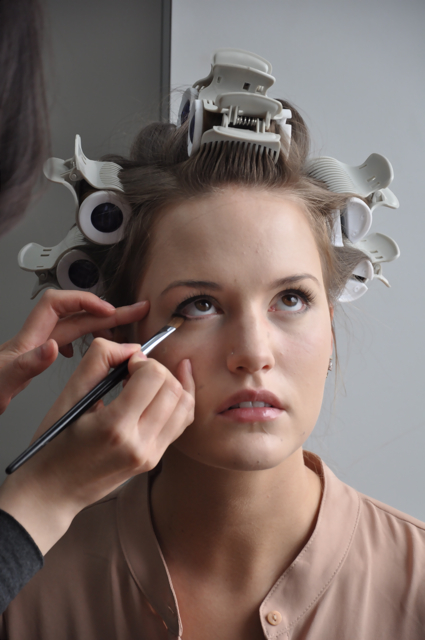
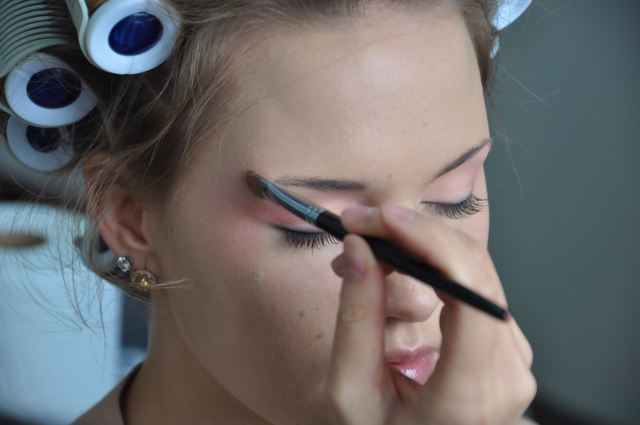
i couldn’t talk about lash extensions without showing some photos! i went to my good friend stephanie trieu who is a lash extension technician in markham. she is based at mccowan and steeles but also does mobile services. during my session, i interviewed her at the same time to find out more about lash extensions and so that i could write about pros and cons that i’d find.

contact: STEPHANIE TRIEU 416.275.1678 || trulyposhbyst@gmail.com

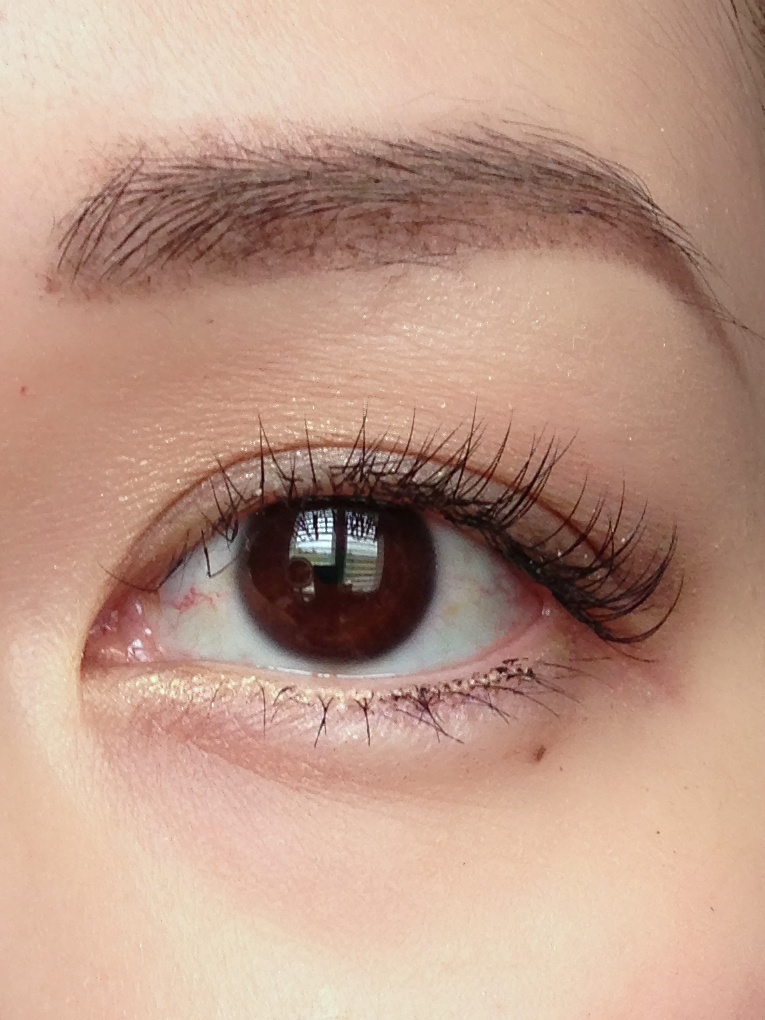
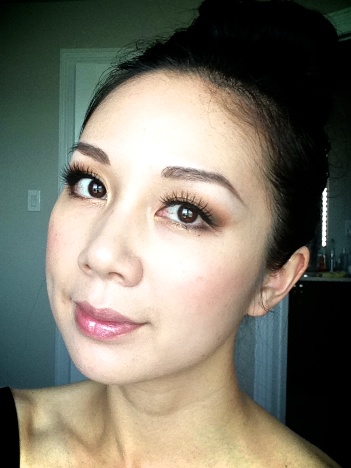
so here are my lashes before the session:

IMG_5727

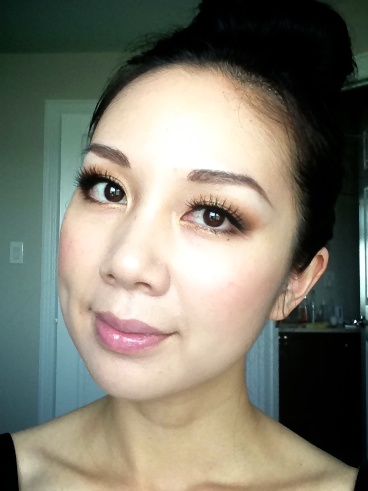
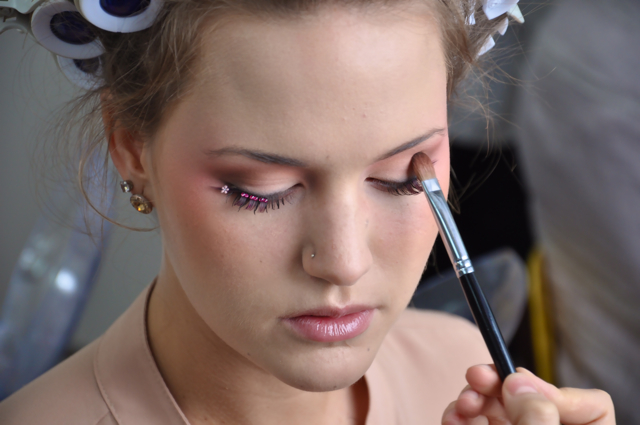
here they are after my session:

IMG_5817

these are synthetic mink lashes. at first, stephanie had applied a full set to each eye (60 lashes) which gave a very natural look. i would recommend that to people who do not normally wear any makeup. but for myself, i’m used to putting several coats of mascara and tight lining my eyes, so i requested more lashes to give a fuller effect.

will lash extensions make my lashes fall off??…

that was my main concern and my question to stephanie. i’ve had bridesmaids tell me horror stories of all of their natural lashes falling off after repeated sessions of lash extensions.

single lash vs. clusters: stephanie explained to me that applying single lash to each individual lash ensures that the extensions fall off with your natural lash cycle. however, if you apply cluster lashes (which are lashes that are kind of like a fork… more than one lash being attached to one real lash) the weight of them could make your real lashes fall off more quickly. although it looks fantastic, ladies should keep in mind that it should not be done repeatedly. you need some time in between to give your lashes a “rest”.

are real mink lashes better than synthetic?…

real mink lashes are much more expensive than the synthetic ones. stephanie explained to me that they are softer, however for that reason they have less of a curl to them. i personally like a nice curl because my asian lashes are so straight that i need the synthetic ones to lift them. i have seen friends with the real mink extensions and i do admit that they look great because they seem more dense and full, but i have not yet tried them myself.

IMG_5729

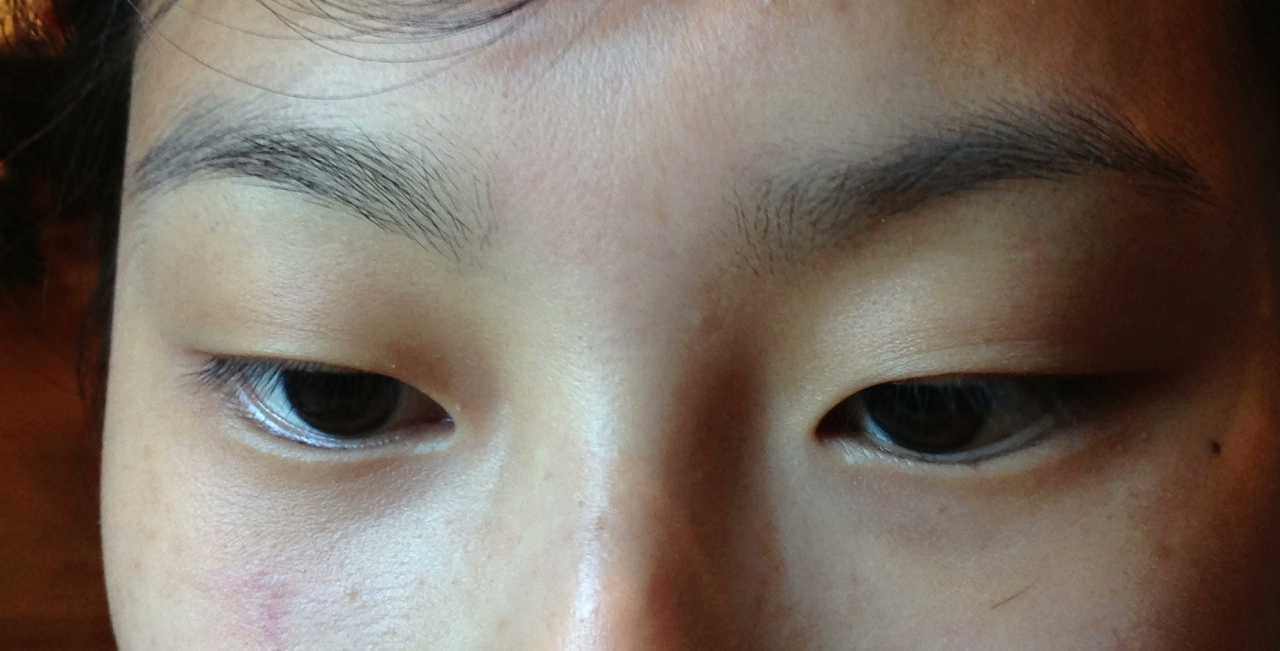
stephanie also explained to me that it depends on how many lashes you have naturally. you notice the gap in my lash line? it’s because naturally, i am missing some lashes there… it could be because i may have accidentally pulled some out when removing my falsies.. oops! so if you’ve got lots of lashes for extensions to be attached to, then you’ll get a fuller set of las extensions.

IMG_5814

i do love how natural they look and how much time it saves me to get ready. i’ve recently been extremely busy and have no time to sit down and really apply makeup, so having the extensions are great!

to sum it up.. pros and cons!

pros: 

  1. saves time getting ready
  2. lasts for 3-4 weeks
  3. great for travelling
  4. saves product (no need for lash curler, mascara or eye liner)
  5. excellent for those who don’t wear makeup
  6. subtle and natural compared to falsies. (when my sister saw me, she thought that i had just used a lot of mascara that day.. lol)
  7. hassle-free compared to falsies (which you have to apply carefully and remove carefully so as not to rip off your own lashes!)

cons:

  1. need to be careful when washing your face (not to rub them)
  2. difficult for those who like to wear makeup (eye makeup remover will loosen the glue for the lash extensions)
  3. not ideal for those who like to work out a lot, i.e. hot yoga (sweat will loosen glue as well)
  4. need to put aside a block of time for application (it takes a few hours to get them done nicely, so be prepared to block out a good amount of time from your day)
  5. lashes fall off at different times which could make your eyes look uneven. you would need to go back to refill them.

IMG_5810 IMG_5807

would i get them again?

i would like to try them in clusters to see how they look. at this point in my life, i would get them again because i’m so busy!

final verdict, falsies or extensions?

i love my falsies so i’d never give them up! to create looks with makeup, i find that extensions could never replace falsies. falsies enhance the eyes far more than extensions could and are essential for creating different types of eyes with makeup. however, for those who don’t like wearing makeup, extensions are the way to go.

IMG_5479many of us tend to shy away from colour when it comes to eyeshadows. i noticed the most popular eyeshadows in north america are usually the neutrals, like browns, taupes, beiges. i wonder if it’s because of the uncertainty of how to apply colour that turn people away from it. if applied in the right places, bright colours like orange are also very wearable!


how to…

here’s how to create an autumn look using vivid orange eyeshadow. you can follow the same steps using any bold and bright coloured eyeshadow to make it super wearable.

autumn eyes


so you can see a hint of orange peeking through which really subtly changes up the typical neutral eye. this would work great with purple, blue or even green eyeshadow; once those colours are paired with a matte brown in the outer corner of the eye, it automatically tones down the colour making it into an accent rather than an overpowering colour.


to finish off…

pair this colourful eye with a soft blush and a nice gloss and you’re done!

pk60s


IMG_5498

it’s so hard to find a good lip gloss that has great colour pay off and that is actually moisturizing. there are many out there that look nice and glossy when first applied, but leaves lips feeling so sticky and starts to look a bit pasty on the lips shortly after the initial application.

when shu uemura came out with the new line of glosses, i thought that just the colours would be new, but to my delight, the formula is much improved as well! when applied, i can feel an ever so slight moisturizing tingle and it actually helped to smooth away the dry little flakes on my lips which usually looks so terrible when i apply a coloured gloss or lipstick over top. my lips tend to be on the dry side, which is why i tend not to wear lipsticks, but i’ve seriously been obsessed with these new glosses. my 2 favourites colours that go great with my fair skin tone are CR 20 S and PK 50 C – I had been wearing these two interchangeably during the entire summer.

here are some images to give an idea what the glosses look like:

close up gloss close up gloss_2

cr10s

CR 10 S – i find this one a bit of a deeper coral for my skin tone; would look nicer on someone who is less fair skinned

cr20 s

CR 20 S – I really like this one!

pk50 c

PK 50 C – I really love the cream texture of this one. great coverage and such a soft creamy pink.

pk60s

PK 60 C – great glitter to this soft pink. i’m not the big glitter-wearer, but if i were, i’d choose this one!

what i love about the new looped applicator…

the existing shu umeura glosses have a straight tipped applicator, whereas the new glosses have a looped applicator which i find smoothes the gloss on effortlessly and scoops out more of the gloss from the tube. the slight point on the tip let’s you get the corners of your mouth very easily.

IMG_5497

overall, i love these new glosses and i think that every girl should have one handy in their purse! so easy to apply (don’t have to whip out a mirror) and gives the right amount of colour so that you don’t look over done. it gives a fresh finish to simple, everyday, natural makeup – which nowadays is so important to me since i’m so busy! not much time to do a full face of makeup anymore!

makeup for monolid eyes is a challenge for many asians. even more challenging is making the makeup natural, as opposed to drawing thick eyeliner across the lid in order for it to show up when eyes are open.

for aspiring actress amanda zhou’s headshots, we did a youthful look using matte brown eyeshadows to keep it very natural.

here is a shot of her eyes before makeup:

IMG_5162 IMG_5163

how to achieve natural makeup for monolid eyes:

  • apply a brown cream base eyeshadow using a natural hair flat shader brush (brush 10) to create the desired shape for the eyes. be sure that the cream shadow shows when eyes are opened.
  • pat a matte medium brown eyeshadow on top of the cream base using the same brush, creating a gradation from the lash line upwards.
  • use a round pencil brush (brush 5R) to apply a matte deep brown eyeshadow to the outer corners of the eyes.
  • curl lashes, then tight line lash line with black painting liner. apply a bit of painting liner above the lash line as well.
  • apply a natural set of lashes and coat both the natural and false lashes with lots of mascara. then, use eyelash curler to clamp both together.
  • apply brown painting liner to bottom lash line and soften with matte medium brown shadow. apply mascara to bottom lashes.

and here are the photos taken by photographer denise grant in toronto:

AZ160 AZ162

and here are some fun shots taken after the shoot:

AZ164 AZ163 AZ155 AZ145

international artistic director for shu uemura, kakuyasu uchiide, designed a lovely pair of limited edition lashes for the christian louboutin exhibition at the toronto design exchange exclusively available in canada!

i used the rouge et noir lashes to create a femme fatale look captured by photographer mark darren mui and edited by the retoucher extraordinaire james mui. we wanted to create a sultry, moody photo composition to complement the seductive and enchanting lashes.

Laboutin-043

how to get the look:

face:

  • ultime8 cleansing oil
  • red:juvenus toner, serum and lotion
  • stage performer instant-glow
  • nobara cream cover stick 764 and pentagon sponge
  • face powder matte in colourless and brush 18R

eyes:

  • m black 990
  • p black 995
  • ir 985
  • me 472
  • natural brush 10, 10F, 10
  • black painting liner
  • brush 4F

brows:

  • brow manicure in ash brown

cheeks:

  • glow on 761
  • brush 20

lips:

  • nude lip liner
  • mon shu red lipstick (karl lagerfeld collection)
  • burgundy luxe lipstick (karl lagerfeld collection)

lashes:

  • rouge et noir lashes in collaboration with christian louboutin

visit www.shuuemura.ca to find out more about the lashes!

the shu uemura spring collection designed in collaboration with japanese artist ob, features four princesses each with their own persona. the second makeup look that i did was based on the cherry blossom princess.

princesses

here’s a look behind-the-scenes at how i created the look using the pink spring palette on lovely model christine mccabe:

Shu-Spring-2

some retouching on set


FACE:

DSC_0714

EYES:

DSC_0718

DSC_0727

  • load up natural brush 10 with light pink shade and press all over lids all the way up to brow and on lower lid
  • brush 11 and light pink shade to soften edges and extend slightly onto temples

DSC_0738

  • use brush 11 to extend light pink shade onto cheekbone area

DSC_0743

  • natural brush 10 and apply dark pink shade to crease; soften with brush 11

DSC_0739

  • brush 5R or 10 to apply dark pink shade along outer lower lid

DSC_0760

  • use natural brush 10 to layer light brown and deep brown shades into the outer crease area of eyes; soften with brush 11

DSC_0780

CHEEKS:
  • brush 15 to apply glow on in M soft orange 542 (blending into pink shade on temples)
  • brush 15 to apply glow on P vivid orange 551 to cheek bones (blending with the pink shadow and the M soft orange glow on)

DSC_0773

DSC_0789

  • add more colour if necessary

DSC_0793

  • after having put on the lashes, i decided to deepen the crease area further with the brown shades

LIPS:

DSC_0794

  • line lips with nude lip liner

DSC_0799

HAIR:

soft princess curls hairstyle designed by Lip Lap of Initium Hair in Markham, Ontario.

DSC_0828

and here’s the completed image:

photo

hope you enjoyed the post! share with all of the makeup artists out there! have fun experimenting!

for spring 2013, shu uemura collaborates with young japanese artist ob to celebrate the rise in a new sensitivity in art. according to ob,

“… reality lies in the world of ambiguity. In between the innocent, beautiful dream world and the physical world. That is what [she] want[s] to express in [her] collection.” – ob

she created a universe where four princesses can be found: cherry blossom princess,  moon princess, forest princess and ocean princess. for the collection, i had the opportunity to create four makeup looks using the new spring eyeshadows and lipsticks to reflect the four princesses.

princesses

this is how i created the ocean princess:

FACE:
  • apply UV brightening underbase using pentagon sponge to even out and prep skin for application of pastel colours
  • brush 18 to apply FA illuminating moisture foundation in fair beige
  • cover crayon to conceal darkness under eyes and redness around nose and lips. blend with synthetic brush 10.
  • brush 18R to apply face powder matte in colourless

EYES: (blue palette) click here to read my review on the eyeshadow palettes

DSC_0704

  • cover crayon on lids to even out skin tone for pastel colours. blend using synthetic brush 10.
  • brush 10F to apply brown painting liner on upper and lower lash line
  • natural brush 10 to apply light blue shade all over upper and lower lids…

DSC_0807

  • extend out to temples

DSC_0815

  • natural brush 10 to apply deeper blue shade to crease…

DSC_0840

  • …brush 11 to soften.

DSC_0842

  • brush 10 to apply light blue and deep blue shade to lower lid

DSC_0817

  • brush 10 and brush 11 to apply lavender shade above temples blending into the blue shade.

DSC_0847

DSC_0851

  • brush 15 to apply yellow shade on cheekbone blending into blue shade on temples.

DSC_0855

  • fill in brows using hard formula in seal brown

DSC_0862

  • line water line with pearly white drawing pencil
  • curl lashes
  • apply natural mascara in black
  • apply oceans beads mini lashes
  • brush 2R to line upper and lower lash line
CHEEKS:

DSC_0852

  • brush 20 to apply glow on in M soft pink

LIPS:

DSC_0874

  • line lips with nude lip liner
  • fill in with light beige rouge unlimited
  • apply gold gloss to centre of lips

HAIR: designed by Lip Lam for Initium Hair

DSC_0886

and here’s the final image:

Shu-Spring-216-4

for the makeup artists out there, have fun experimenting with this look!

review for the ob collection to come soon!

getting ready for spring? it’s time to pull out some colourful eyeshadows and to shop for some new makeup goodies to add to your collection! flipping through magazines and browsing online, i was inspired to create a aqua marine makeup look to reflect the spunky colourful liners seen on the runways this spring season.

loulou magazine also featured this look in the march 2013 issue:

CameraAwesomePhoto


image taken from loulou magazine march 2013 issue

this is my version using the new shu uemura spring 2013 dream blossom blue palette:

CameraAwesomePhoto_1

this look is so easy to recreate:

FACE: keep skin soft and fresh using minimal makeup

  • cleanse skin using cleansing oil (i like to use the fresh one – pink bottle)
  • hydrate skin so that makeup smoothes on nicely; for very clean and fresh looking skin, i recommend using the hydrabtility intense moisture filling
  • apply shu uemura bb perfector cream – available in stores in canada
  • lightly dust loose powder matte to areas that tend to get overly shiny i.e., nose and forehead
  • spritz face with depsea water (i’m currently using mint)

EYEBROWS: for a softer spring look, shape eyebrows so that they are more straight than arched

  • shape eyebrows using shu uemura hard formula (i use seal brown)
  • soften them using brush 6OB
  • i like to set my brows in place using the shu uemura brow manicure in ash brown

EYES: i used the dream blossom blue palette for this look. click here to read my review on the palette.

Photo23

eyes1

eyes2

CameraAwesomePhoto

CHEEKS:

LIPS:

  • make sure lips are well moisturized. i like to use the depsea hydrability lip balm.
  • apply new ob sakura pink rouge unlimited for a cute pink pout

CameraAwesomePhoto_2

have fun experimenting with this trendy aqua marine look!

spring is finally around the corner! i’m sure we’re all looking forward to ditching those bulky winter coats and to tap into some of the new spring 2013 trends! march’s issue of loulou magazine outlined the hottest makeup trends for this spring. several of which can be created using the new shu uemura dream blossom collection.

the first trend that i’ll be featuring is warm and mysterious smoky eyes. i think this look is best achieved using matte eyeshadow shades while keeping skin and lips clean and neutral.

CameraAwesomePhoto

image taken from loulou magazine’s march 2013 issue

here is my version:

CameraAwesomePhoto_9

to recreate this look:

FACE: keep skin clean and fresh

  • always properly cleanse and prep skin. i used shu uemura fresh cleansing oil (the pink bottle) and the hydrability line.
  • apply pore eraser uv underbase using pentagon sponge
  • apply illuminating moisture foundation (my shade is medium light sand 564) using the same sponge
  • dust a very small amount of face powder matte in colourless on areas that then to get oily. we want to keep skin fresh, so use a minimal amount.
  • spritz face with depsea water (i’m using the mint one right now – refreshing!) to get a dewy finish and to set the makeup.

BROWS:

  • naturally define brows with small strokes following the direction of hair growth using hard formula (my shade is seal brown)
  • i like to apply the brow manicure to keep my hairs in place (i used ash brown)

hard formula

brow manicure

EYES: this look was created using the pink palette from the dream blossom collection (click here to read a review on the palettes) this technique works for monolid eyes as well.

eyes3

eyes4

CameraAwesomePhoto_5

these are the brushes, products and tools that i used (click on images to visit the shu uemura website):

Photo24

2r

brush 2R

4f

brush 4F

5r

brush 5R

10

natural brush 10

11

brush 11

lashcurler

eyelash curler

painting linerstrech xtreme

                   brown painting liner                                       stretch xtreme mascara

CHEEKS: keep cheeks pretty neutral. add a bit of colour for dimension.

CameraAwesomePhoto_1

LIPS: for this look, keep lips very neutral so that the attention is all kept in the eyes.

  • line lips with neutral lip pencil
  • fill lips with new rouge unlimited in light beige

light beige

have fun experimenting! more spring looks to come!

the shu uemura spring 2013 dream blossom collection features five new glow ons. these glow ons are all of pearl texture so they reflect light subtly giving the most natural glow of colour. shu uemura glow ons have always been amongst a makeup artist’s favourites. it’s because of it’s smooth texture that creates such a flawless, non-powdery finish. it’s extremely finely milled and is even safe to use around the eye area.

Photo7

from top to bottom: P light yellow 020, P vivid orange 551, P soft orange 542, P soft coral 332, P soft pink 324

Photo1

left to right: P light yellow 020, P vivid orange 551, P soft orange 542, P soft coral 332, P soft pink 324

Photo6

P soft yellow 020

P soft yellow is perfect for highlighting. it gives a beautiful glow to cheekbones and the bridge of the nose. i find the finish and highlighting effect is best when applied with brush 13G. for the smoothest and most beautiful application, be sure to use the flat side of the brush to apply glow on.

13

brush 13G (click on image to visit the shu uemura site)

Photo5P vivid orange 551

P vivid orange is a high pigment glow on so a little goes a long way! this shade would look lovely on tan skin. i would recommend using this shade after having had a bit of colour from the sun. if your skin is still fair from the long winter months, i would opt for the P soft orange shade. i suggest applying this glow on as a contour (more in the hollows of the cheeks) using brush 20h. use a light sweeping motion beginning from the upper part of ear sweeping towards the nose in a diagonal line. *picture an imaginary line going downward from the outer part of your eye and be sure not to pass this line!

20h

brush 20h (click on image to visit the shu uemura site)

Photo4P soft orange 542

P soft orange is such a warm and peachy shade. it looks so great on fair skin, but also gives a healthy sun-kissed glow to tan skin. i would recommend applying this shade to the apples of the cheeks using brush 20. for the most colour payoff, but sure to use the flat side of the brush to apply (and not the tips of the bristles). most shu uemura brushes are designed flat, as opposed to dome-shaped. this gives a smoother finish with precision and avoids fall off or having powder fly everywhere!

20

brush 20 (click on image to visit the shu uemura site)

Photo3

P soft coral 332

P soft coral is one of my favourites! it gives the most natural rosy flush to the apples of the cheeks. my foundation shade is medium light sand 564 and i find that this shade and the P soft pink look best. i find that pink blushers brighten up my skin as opposed to the orange shades.

Photo2

P soft pink

P soft pink is such a pretty shade. it’s perfect for a sweet makeup look. it looks adorable on fair skin and on more tan skin it peaks through like a healthy flush. i recommend applying this shade on the apples of the cheeks using brush 20.

Photo26

doubles as an eyeshadow or a glow on case

the collectable unmask palette case, just like the regular shu uemura cases, can be used for eyeshadow and glow on refills. simply slide out the inside holder and pop in the refills! no magnets or adhesive required.

pick your shade and have fun creating your makeup looks!